Showing posts with label cooking. Show all posts

Wednesday, November 9, 2011

Chile Verde Pulled Pork Tacos

Here's one of those little recipes that helps us overcome our Tex-Mex withdrawal blues. Those of you who haven't developed such an addiction are sure to be in for a treat as well because this dish checks so many crucial boxes otherwise: savory = check, slow-cooked = check, slight spice = check, can-eat-it-from-a-bowl = check... there are many more qualities but, I'll let you discover for yourself. These good-as-street-style tacos are sure to please, be it by bowl or tortilla, and I guarantee they'll leave your posse begging for more.


Chile Verde Pulled Pork Tacos (original Lewis recipe)


Ingredients
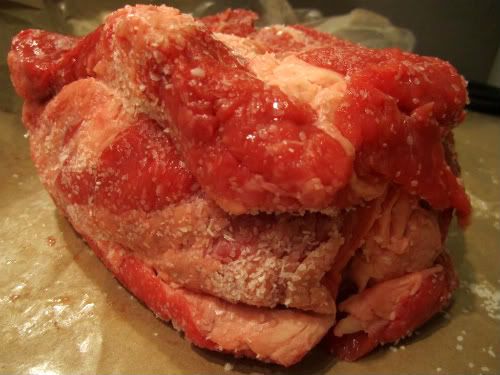
2-3 lb pork shoulder roast
2 large white onions, finely chopped
1 lb tomatillos, washed and roasted
3-4 poblano peppers, washed and roasted
2 cloves garlic, minced
2 C chicken broth
Oregano
Cumin
Salt, pepper
Kosher salt
Queso fresco for topping
Flour
Corn tortillas
Tortilla chips (optional)

Directions
Preheat oven to 500

Place tomatillos/poblanos directly on wire rack for roasting; place foil below to catch any drippings; roast for 10-12 minutes or until roasted, turning a few times.
Once roasted, remove stems and seeds from peppers and chop finely; set aside. (Need help remembering how to roast? Check my crash course here)


Pour a few Tsp canola or vegetable oil into medium-medium-high Dutch oven.
Season pork shoulder with kosher salt and pepper and lightly coat with flour.
Once Dutch oven is fully heated, sear pork roast 2 min/side until dark golden brown coating forms. Then remove pork and set aside on a plate. Discard oil from Dutch oven.

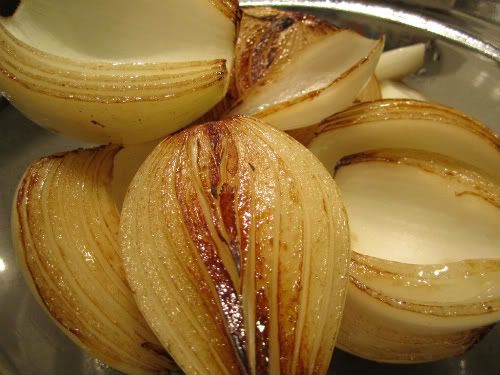
Add into Dutch oven 3 Tsp vegetable oil and bring it back to medium heat. Add onion, saute. Add minced garlic once onions are almost sauteed. Stir a few minutes and turn heat down to medium-low. Add finely chopped tomatilos and poblanos. Add salt, pepper, oregano and cumin to taste. Cook for a few minutes until the mixture reduces.


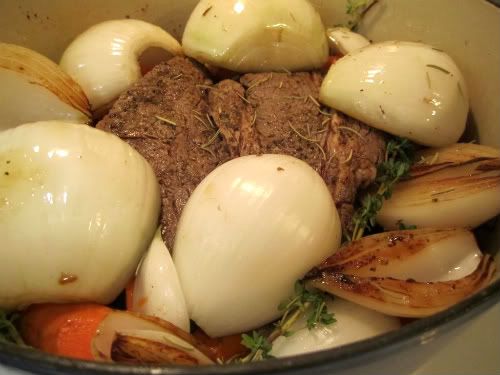
Add pork shoulder back into Dutch oven. Pour in chicken broth until it covers 3/4 pork shoulder. Turn down heat to a low simmer and let it simmer, uncovered, for about 3 hours, turning the pork every 45 minutes/hour; add broth when the liquid gets low.

Remove the roast and it should be fork tender at this point. Turn up heat on green chile sauce to medium and stir and reduce for 10-15 minutes. Pull pork shoulder using forks and add back into chile sauce.


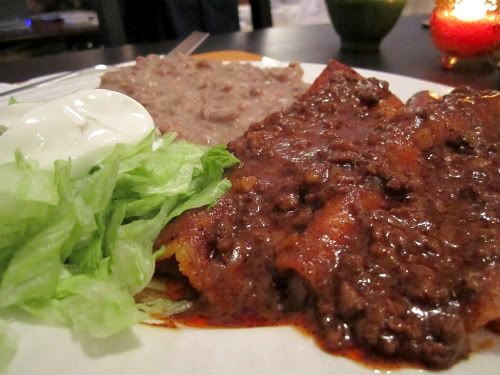
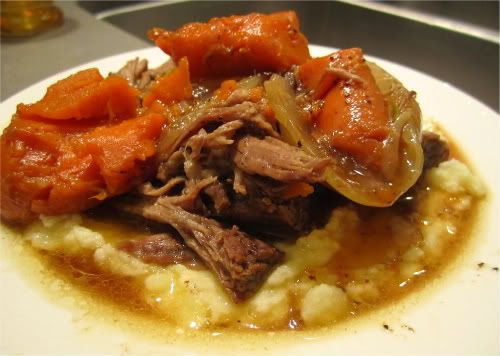
Serve in corn tortillas with yummy queso fresco and a squeeze of lime! Also delicious in a bowl atop tortilla chips - you won't be disappointed :)


Friday, January 14, 2011

Chicken Souvlaki

Want to make the easiest/healthiest dinner of all time? It requires only about 1%* actual cooking (none if you plan ahead) and is seriously delish and nutrish (pushing my luck?).

Try our Chicken Souvlaki.

As the experts say, a Mediterranean diet is healthful and nutritious. This recipe is inspired by one of our favorite dives in Princeton: Olives.

Have you been?

It's a quick little Greek market with tasty treats like chicken parm, lots of baked goods, breakfast egg dishes - and of course - Souvlaki. Olives' chicken souvlaki was legitimately responsible for 75%* of Hubby's nutrition during his undergraduate years. I can't blame him.

Here's our version.

Ingredients**
1 lb chicken (buy a rotisserie and you'll never touch a pan!)
1 head of lettuce, shredded
1 tomato, sliced
1 red onion, very thinly sliced (who wants a big chomp of red onion? sick.)
Tzatziki sauce (nothing fancy here - we bought a tub from Whole Foods)
Pitas (1 package will have 4-5; you'll want 1 pita per person)
Oregano
Salt and Pepper

Directions
If you bought unprepared chicken, season it generously with salt and pepper
Cook in a frying pan with about 1-2 Tbsp olive oil over medium heat (5 minutes per side, or until golden); remove, slice and let cool
Spread Tzatziki sauce on pitas
Layer all the good stuff!
Might I recommend this order*?
Tzatziki Sauce
Lettuce
Chicken
Tomato
Onion
*It ensures the least amount of spillage and mess, because if you haven't figured it out yet, you'll be eating this with your fingers, and if you're anything like me, you're having a tiny panic attack.


Want my advice? Go heavy on the sauce.

Because this sandwich is low in calories, you'll want to supplement it with a side or two. We used tabouli (prepared sides from Whole Foods), but anything you like will work!

Serve and enjoy!


*Percents in this post are approximate. 

**You know what else would be awesome in this Souvlaki? Pickles. And/or hot peppers.

Monday, January 10, 2011

Braised Beef Short Ribs

In case it hasn't been made clear enough in the past, we do love a good meat and potatoes dish. The latest from Hubby's kitchen: Braised Beef Short Ribs.


In short, we are obsessed.

No pun intended :)

Do you like tender meat and rich, flavorful sauce? I thought so. This dish made me forget all about my snowy walk home from work. Surviving the freezing temps just got a little more bearable.

Ingredients
Serves 4
4 boneless beef short ribs - approx. 2 lbs total (we have gotten bone-in as well... we found boneless was just as delicious and tender! And - dare I say it? Boneless = healthier)
1 onion
2 carrots
2 celery ribs
1 tomato
2 Tbsp tomato paste
2 C dry red wine
Olive oil
Vegetable oil
Salt, Pepper
2 bay leaves
1/2 tsp oregano
Rosemary (sprinkle; can be fresh or dry)
Flour (for dusting the beef, about 2 Tbsp)
Beef broth

Directions
Preheat oven to 325
Very coarsely chop onion, carrot and celery
Put in Cuisinart and puree to coarse paste, remove and reserve
Cut tomato into large pieces, puree in Cuisinart, remove and reserve
Generously salt and lightly flour short ribs
Put 2-3 Tbsp oil in dutch oven (we used 1/2 EVOO and 1/2 veg oil because VO has a higher smoking point) and bring to medium heat
Sear short ribs about 2 min/side or until nice brown crust forms - don't overcrowd your pan! You may need to do do it in 2 shifts
Remove short ribs and drain pan of oil
Put a fresh 2-3 Tbsp of same oil mixture and bring back to med. heat
Add in vegetable paste and spread in pan
Cook 5-7 min or until light brown crust forms at bottom of pan
Scrape, respread, allow crust to reform; scrape, respread, allow crust to reform (do this 3 times total... crust will develop more quickly with each repetition, so watch it closely)
Add tomato puree, stir and cook for a few minutes
Add tomato paste, stir and cook 3-5 minutes or until mixture starts to turn brown
Deglaze pan with dry red win and stir until it forms a smooth mixture
Add pepper and oregano
Add salt to taste (about 1 tsp)
Cook down until mixture halves itself
Add beef short ribs back in and spread out in pan
Pour beef broth until short ribs are almost covered
Add 2 bay leaves and a sprinkle of rosemary
Put lid on and put in oven
Braise for 3 hours, turning and re-basting every hour
For the last 20 minutes, remove top completely to allow mixture to reduce and meat to brown
Remove and let cool for 20 minutes

Serve atop mashies for maximum deliciousness!


Friday, December 17, 2010

Weekend Warmer

Sometimes you just have to make something decadent.


We are big mac and cheese fans here. I think it runs in my family, as a kind of genetic trait that will inevitably pop up in generations of Broaddus/Roe/Lewises to come. One of my cousins (you know who you are) has dedicated a significant portion of her life to searching for the best mac and cheese on the planet. This is serious business. All that to say, we don't take mac and cheese recipes lightly and extensive research was conducted to ensure maximum deliciousness results from the below recipe.

The secret is simple: it's all in the cheese and the rue. Choosing a quality cheese is key for making sure your mac has enough savory flavor. Use this simple method below (adapted from Southern Living and Pioneer Woman) as a dish - or a starting point - for making an awesome creation. Think: diced ham, green chiles, shallots, bacon, broccoli. Your choice completely.

You'll notice we baked our mac and cheese at the last step - this is certainly not required. It is a good idea to bake it if you won't be serving it immediately. It also makes it very easy to transport and would make a fantastic delivery meal for a friend who has a new baby or needs some extra TLC. If you choose not to bake, then you can serve a creamy rich portion to your guests right when you finish stirring in the cheese.

Ingredients
4 C macaroni noodles (cooked till just before al dente)
1 egg, beaten
1/2 C butter
1/4 C flour
2 1/2 C whole milk
2 tsp dry mustard (I did not use and it was totally fine)
1 lb cheddar cheese (we used Australian cheddar - OH so good)
1/2 tsp salt
1/2 seasoned salt (I did not use, totally fine)
1 tsp pepper

Directions
If you're like me, measuring out your ingredients before you start makes cooking much easier, and even more fun! Sometimes I forget an ingredient or step here or there, so this step ensures I do everything to the T.

Preheat oven to 350 and butter a 9 x 13 baking dish.
Cook and drain the macaroni. Set aside.
Beat egg in separate bowl.
In dutch oven, melt butter and add flour; whisk together (medium-low heat) for five minutes. Whisk constantly so it doesn't burn.
Add the milk.
Add mustard (if you're using) and whisk until thick (5 minutes).
Turn heat to low and temper the egg (add some of the hot butter/milk to the egg and stir to bring it up to temperature... we're not making scrambled egg mac and cheese, silly).
Pour egg into dutch oven with other sauce and stir.
Add cheese, reserving 1/2 C and stir till melty melty.
Add S&P. Taste test and correct as needed.
Add cooked macaroni.
Now you have two choices:
A - Serve immediately.
B - Spread in buttered baking dish and pop in the oven (add remaining cheese on top, obvi).
If you choose B, bake for 20ish minutes until top cheese is bubbly and delicious. Option B allows you time to prep other parts of the dinner/clean your house/round up the kids/set the table. Option A allows you to tame the masses immediately!

Good luck!


My little helper fell asleep on me!

Saturday, December 4, 2010

What could be better?

...than a slow Saturday morning with pancakes and bacon?


Can't think of anything at the moment :)

Thursday, December 2, 2010

Meatloaf

Do you like meatloaf? I sense it can be a polarizing dish. As a child I felt the need to hide my love for this notorious cafeteria food... but thankfully, I can come clean with my love for meatloaf because comfort foods have truly made a comeback. I've been pleased to find this hearty course on many a modern menu.

For an easy dinner, here's a meatloaf topping that is easy and delicious - and I bet you have all three ingredients in your pantry right now. We buy our meatloaf "ready to bake" from the grocery store (Whole Foods for us here in Cambridge, but Dallas people, CM has these prepared loaves near the butcher's area). Obviously, homemade is probably better, but the ready to make version is just fine when you want minimal involvement with dinner preparations :)

Personalize yours with this super easy topping from Paula Deen:

Ingredients:
1/3 C ketchup
2 Tbsp brown sugar
1 Tbsp prepared mustard (I used Dijon because that's what we had on hand, and it tasted delish)

Directions:
Preheat oven to 375
Mix topping ingredients and spread on your meatloaf
Bake for 1 hour


Thursday, November 18, 2010

Friends and Chicken Pot Pie

Good friends in town warrant a good meal to share.

Here we are, the ESD ladies in the Boston Common! Well, we're actually in the Public Garden if you want to get technical. After our quick very-mini-tour of town, we headed over to my place to enjoy a big cozy bowl of  chicken pot pie. I did a major no-no and cooked PW's pie (told you I was obsessed with her recipes) for the first time ever while these sweetly smiling girls waited patiently and we caught up on life.

Thankfully, it was good! (hopefully I'm not overestimating myself, M and V?)

I totally cheated on the crust and used a Pillsbury roll out crust - as expected, it did not disappoint. (See Hubby's mother's perfect pie crust method here)

Want to give it a try? It really is satisfying and super easy to get together! Will warm up your gang in no time on a chilly night.

Ingredients:
1 whole bone-in chicken breast (can use entire fryer if you want, but I prefer white meat)
1 bag of frozen peas
3 medium carrots, diced
1 onion, diced
3 celery stalks, diced
1 C heavy cream
1/2 stick butter
2 C chicken broth
Splash of white wine
1/4 C flour (may need to add more to reach desired thickness... I probably landed somewhere in the 3/4 C neighborhood)
2 pie crusts (top and bottom; handmade is always best, of course, but if you're in a time pinch, Pillsbury pie crust in a can works wonders)

Directions:
Preheat oven to 400
Cook chicken by placing in a large pot, covering in water and bringing to a boil (should cook in about 20 minutes)

While chicken is cooking...

Place the bottom pie crust on your dish in preparation to be filled

Saute carrots, onion, celery in butter in a dutch oven until soft and translucent
Remove chicken from water and pull off as much meat as you can with a fork
Add chicken and stir, then sprinkle flour over mixture
Add the broth, stir, add heavy cream (no need to use it all if it freaks you out)
Add plenty of salt and pepper to taste
Add flour if needed to thicken

Add mixture to your pie dish
Cover with other pie crust and cut slits on top for ventilation
Bake for 30 min until bubbly and golden
Let cool slightly, serve and enjoy!

Like I told you, this recipe is from The Pioneer Woman cooks, and you can find a similar variation here. Would be an awesome idea for getting rid of turkey and leftovers after Thanksgiving.

Tuesday, November 16, 2010

Taste of Home

Hubby made my favorite meal this week... a nice little trip back home to Texas! Cheese enchiladas (Dallas-style, with chile con carne) and homemade refried beans :)


You can see our recipe for New Mexico style enchiladas here.

Mark's Dallas-style Enchies

Ingredients
1 dozen corn tortillas

Sauce:
1/2 lb ground beef
2 C beef broth
1/4 C vegetable oil
1/4 C flour
4 Tbsp chili powder
4 tsp cumin
1/2 tsp Mexican oregano
1/2 tsp black pepper
1 tsp garlic powder
1 tsp salt

Filling:
Cheddar cheese (1/4 C for each enchilada)
1 onion, finely diced (2 Tbsp in each enchilada)

Directions:
Brown beef in skillet and set aside
Heat oil in skillet on medium heat and wait until fully heated
Once hot, sprinkle in flour and stir with spoon until smooth; cook for a couple minutes until turns golden/blond color
Add in all spices and mix until smooth for a couple minutes
Add beef broth a little at a time until it thickens (continue this until you've used all broth)
Next add the ground beef you set aside earlier
Cook and stir until desired consistency (too thick? add some water)
Now, your sauce is ready.

To assemble the enchiladas, first fry a corn tortilla quickly in oil (for about 7-8 seconds/side; tortillas should bubble but not turn into crispy chips)
Next, place plenty of cheese and chopped onions in the tortilla and quickly roll and place in baking dish

Continue this assembly until you have used all your tortillas. You'll want 2-3 enchiladas per person.


Once baking dish is full, pour on the sauce, add cheese on top, and bake at 450 for approx. 10 minutes or until bubbly.

...when we go home to Dallas for Christmas, I will be highly disappointed if we don't eat Mexican food at least once-a-day.

Sunday, October 24, 2010

How to Get a Husband

It's simple, really. And Jane Austen's Mrs. Bennett would be proud, I think, of the scheme I'm going to show you. I'm certainly not in the market for a husband, but if I were, I'd make this. Hubby pretty much melted out of his chair when he ate this last night (and then again tonight).


It is the ultimate love recipe - slow braised beef, creamy mashed potatoes, savory-smelling kitchen... all things good.

My brother and sister-in-law and their three sweet kiddos gave me an excellent birthday gift, which was really so generous - it was such a treat to receive.  Without further ado, The Pioneer Woman Cooks. Since September, I haven't put this cookbook down. If you're not familiar with the Pioneer Woman (PW), I highly recommend you click immediately over to her blog, which is awesome, I must say.

This weekend, the temperatures were a little bit cooler, which left Hubby and me feeling a little cold and sorry for ourselves. But no fear, pot roast and mashed potatoes were on the way. The Pioneer Woman's pot roast and mashed potatoes, to be accurate.

You can see the recipes I used from her here and here. I could not recommend this dish more highly for a satisfying and cozy treat on a crisp fall day. Plus... pot roast atop mashed potatoes? Need I say more?

We bought a 3 lb. chuck, and it heartily fed us for two dinners, and I still get to bring a little to the office for lunch tomorrow (did I mention how much Hubby eats? This is saying something).

Happy cooking!


LinkWithin

Related Posts with Thumbnails