Tuesday, November 30, 2010

My Try at Festive Pie

Paula's pie was a success. It's just too bad my crust decorations weren't quite up to par... let me tell you what I'm talking about.

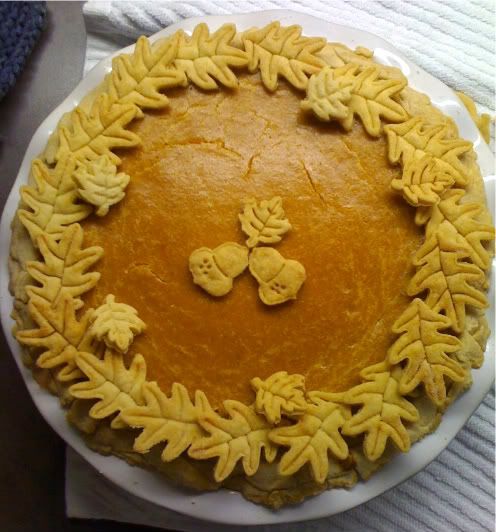
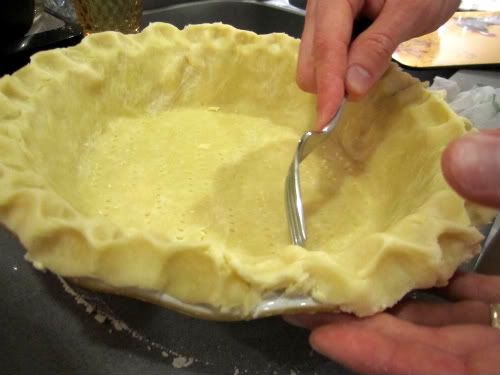
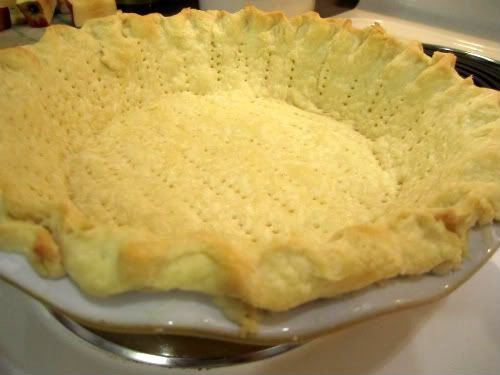
I got over-ambitious when preparing our pie and decided to add a little decor.

First, I decided to add a some festive holly:


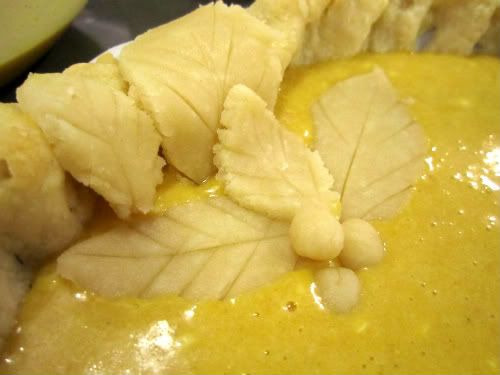
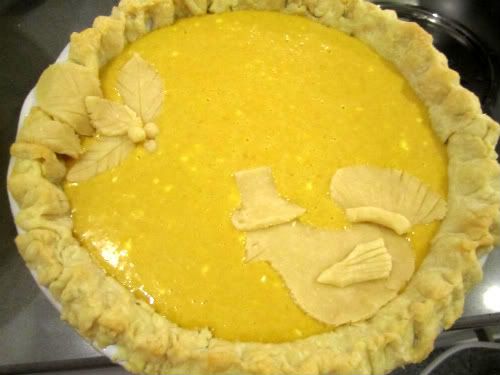
So far, so good. I think I'll make a turkey. A pilgrim turkey!


Yikes. Is it obvious this started off as a baby bird? I decided that looked a little too Spring-ish, though, thus the turkey transformation.

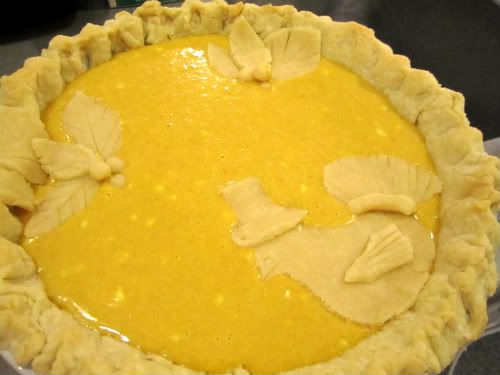
All was (fairly) fine and well...


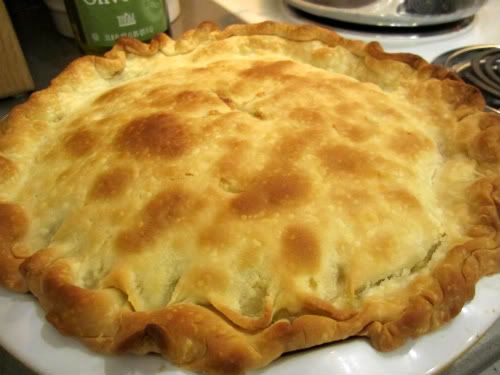
Until I popped it into the oven and realized: I should have baked the topping decorations separately. But it was just too late.


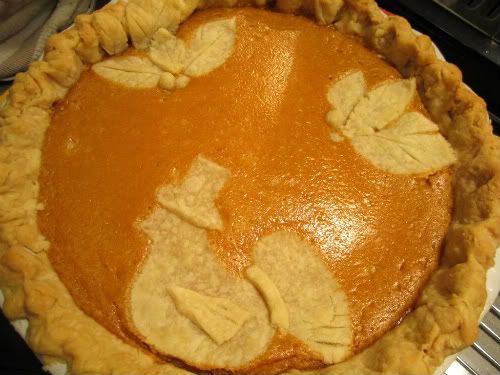
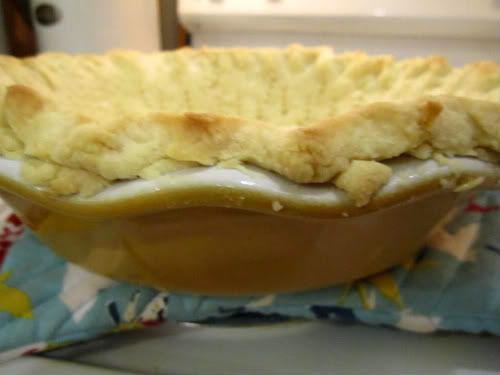
So it really could have been worse, but as you can see, many of my painstaking details were lost. As the pie expanded, the unbaked crust did not. It didn't get that nice golden crispness that the rest of the crust has. In a perfect world, I would've baked the hollies and turkey on a baking sheet and placed atop the pie once both were baked fully.

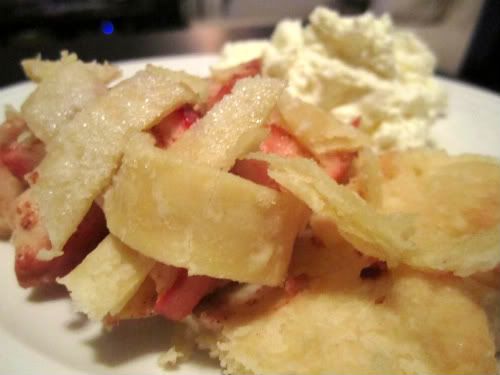
You can also notice some sinkage:


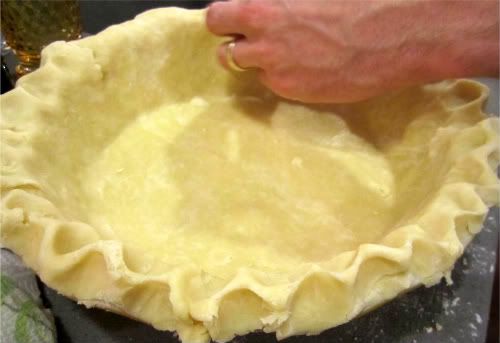
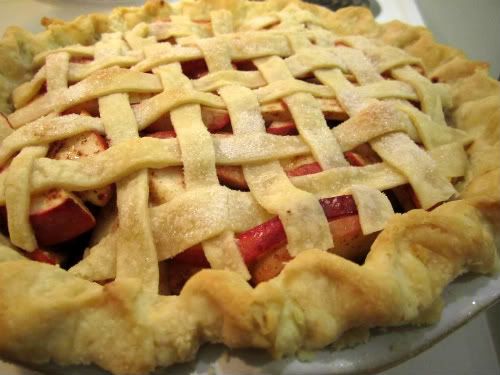
Anyway, I don't mean to undermine the deliciousness of Paula's Pumpkin Pie. It's a cross between cheesecake and pumpkin pie, which gives it a nice richness you pumpkin pie-phobes might desire, while adding a special savory element to the classic version. And, of course, the perfect pie crust worked like a charm.

We had a great time visiting our family, nonetheless! We had a beautiful and delicious meal prepared by my Aunt, and even celebrated three special birthdays. Good thing we didn't actually put 91 candles on the cake...


Hope you had a happy Thanksgiving too! Dixie sure did and she's still recovering from our big touch-football game last Friday.
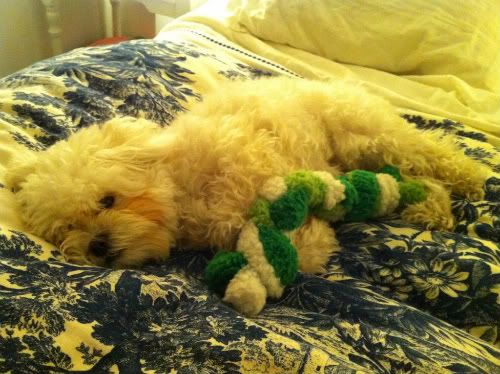


Rough life!


*Addendum* Please note my BFF Emily's masterpiece:


Now we're talking!

**Addendum 2** no fair using cookie-cutters/do we have the same Emile Henry Auberge Pie Dish?? LOVE! I am working my way to a complete set of the line :)

Saturday, November 27, 2010

Cards for Christmas

If you can open your eyes yet from your cozy Thanksgiving nap, I'd love to hear what you're thinking and planning for holiday cards this year. Time to shift gears, because a little birdie friend kindly reminded me a couple weeks ago that, 'tis the season, as she searched for a darling card of her own.

Bright colors and merry wishes are everywhere, and it will be such a decision! Of course I will try to utilize  a holiday savings - after all, this is Life as a Wife: Business School Wife Edition.

Last year we went with Snapfish and it really was great. I felt we could maximize our budget and get a quick, fast turnaround because let's face it... it's hard to be on time!

I'm normally a fan of photo cards for Christmas, but you know I can't resist pretty paper...  Paper Source has some adorable notes and you can even customize to make your own envelopes and notes. Kind of sounds like a lot of work (as if tracking down addresses and stamps isn't enough work!), but look how cute! I might just have to make an exception:


All cards and photos are from Paper Source.

Thursday, November 25, 2010

Giving Thanks

Be joyful and give thanks today! As Hubby and Dixie and I drive to Uncle Mikey's house for our East-Coast Thanksgiving, we are thinking of our families and friends back home and in other states and send our love to you all.


"Blessed be the God and father of our Lord Jesus Christ, who has blessed us in Christ with every spiritual blessing in the heavenly places, even as he chose us in him before the foundation of the world, that we should be holy and blameless before him." Ephesians 1: 3-4

Tuesday, November 23, 2010

Perfect Pie Crust

After Hubby and I got married, one of the first Lewis recipes that was shared with me is Hubby's mother's pie crust recipe. The recipe was taught to her as a child, and she tells stories of sitting on the counter top, learning to make crust and homemade pies. Though, at 25, we're too big to sit on the counter, maybe one day our future little Lewises can have the same memories of baking tasty treats.

What perfect pie crust wouldn't start with shortening and butter? The original recipe is 100% shortening, but Hubby and I normally use half of each.... for no reason other than it's a little hard to put any shortening at all in a recipe these days :) But if you're up for the risk, it certainly is delicious. You will have a dreamy, flaky crust... but if it is the rich, buttery flavor you are after, then butter is your best friend. Well, Hubby and I just can't decide what is better, so we just do both. So here's the rest of the method.

Ingredients:
For one single pie crust*
1 1/2 C sifted all-purpose flour
1 tsp salt
1/4 C butter
1/4 C shortening
4-5 Tbsp ice cold water
*Double if making two pie crusts, for top and bottom

Directions:
Sift flour and salt into large mixing bowl
Add shortening and butter, cut into small pieces
With a fork or food processor, quickly and gently stir, being careful not to over-stir
The dough should take a mealy, course texture
Work dough into thick disc and wrap tightly in saran wrap (if using doubled recipe, make 2 thick discs)
Refrigerate for 30 minutes
After 30 minutes, flour a flat surface and carefully roll out the dough, so as not to create any new cracks (this is really hard)
Roll out the dough until it is just larger than your pie dish
Place dough in pie dish, careful not to handle it too much
Shape the edges how you like (we used the thumb method below, but another idea is to crimp the edges with a fork)
Bake the bottom crust until light golden color (maybe 15 minutes at 350)
Let the crust cool completely, and then add your filling
If making a crust for topping, add it now and take care to cover the edges so they don't burn; we use aluminum foil, but you could get fancy and buy a reusable one (note to Santa: this would be a great stocking stuffer - oh, shameless - on with the recipe!)
For a flaky and beautiful presentation, paint your crust lightly with water (use you pastry brush) and then dust with granulated sugar
During baking, of course keep the oven door closed without too much peeking, but if you must, then check to ensure no portions of the crust are burning; if something looks fragile, cover it with foil
Enjoy!


As you can see, this is from when we made our apple pie a couple weeks back, but you can use it for just about any of your crust needs. It would've been excellent with our chicken pot pie, and we plan to make it again on Wednesday to go with Paula's Pumpkin Pie. This pie is really divine if you're looking for a (decadent) pumpkin pie recipe for your Thanksgiving table. I'm planning to bring mine to Uncle Mikey and Aunt Diana's house for our East-Coast Roe Thanksgiving celebration. More on that to come!

Thursday, November 18, 2010

Friends and Chicken Pot Pie

Good friends in town warrant a good meal to share.

Here we are, the ESD ladies in the Boston Common! Well, we're actually in the Public Garden if you want to get technical. After our quick very-mini-tour of town, we headed over to my place to enjoy a big cozy bowl of  chicken pot pie. I did a major no-no and cooked PW's pie (told you I was obsessed with her recipes) for the first time ever while these sweetly smiling girls waited patiently and we caught up on life.

Thankfully, it was good! (hopefully I'm not overestimating myself, M and V?)

I totally cheated on the crust and used a Pillsbury roll out crust - as expected, it did not disappoint. (See Hubby's mother's perfect pie crust method here)

Want to give it a try? It really is satisfying and super easy to get together! Will warm up your gang in no time on a chilly night.

Ingredients:
1 whole bone-in chicken breast (can use entire fryer if you want, but I prefer white meat)
1 bag of frozen peas
3 medium carrots, diced
1 onion, diced
3 celery stalks, diced
1 C heavy cream
1/2 stick butter
2 C chicken broth
Splash of white wine
1/4 C flour (may need to add more to reach desired thickness... I probably landed somewhere in the 3/4 C neighborhood)
2 pie crusts (top and bottom; handmade is always best, of course, but if you're in a time pinch, Pillsbury pie crust in a can works wonders)

Directions:
Preheat oven to 400
Cook chicken by placing in a large pot, covering in water and bringing to a boil (should cook in about 20 minutes)

While chicken is cooking...

Place the bottom pie crust on your dish in preparation to be filled

Saute carrots, onion, celery in butter in a dutch oven until soft and translucent
Remove chicken from water and pull off as much meat as you can with a fork
Add chicken and stir, then sprinkle flour over mixture
Add the broth, stir, add heavy cream (no need to use it all if it freaks you out)
Add plenty of salt and pepper to taste
Add flour if needed to thicken

Add mixture to your pie dish
Cover with other pie crust and cut slits on top for ventilation
Bake for 30 min until bubbly and golden
Let cool slightly, serve and enjoy!

Like I told you, this recipe is from The Pioneer Woman cooks, and you can find a similar variation here. Would be an awesome idea for getting rid of turkey and leftovers after Thanksgiving.

Tuesday, November 16, 2010

Taste of Home

Hubby made my favorite meal this week... a nice little trip back home to Texas! Cheese enchiladas (Dallas-style, with chile con carne) and homemade refried beans :)


You can see our recipe for New Mexico style enchiladas here.

Mark's Dallas-style Enchies

Ingredients
1 dozen corn tortillas

Sauce:
1/2 lb ground beef
2 C beef broth
1/4 C vegetable oil
1/4 C flour
4 Tbsp chili powder
4 tsp cumin
1/2 tsp Mexican oregano
1/2 tsp black pepper
1 tsp garlic powder
1 tsp salt

Filling:
Cheddar cheese (1/4 C for each enchilada)
1 onion, finely diced (2 Tbsp in each enchilada)

Directions:
Brown beef in skillet and set aside
Heat oil in skillet on medium heat and wait until fully heated
Once hot, sprinkle in flour and stir with spoon until smooth; cook for a couple minutes until turns golden/blond color
Add in all spices and mix until smooth for a couple minutes
Add beef broth a little at a time until it thickens (continue this until you've used all broth)
Next add the ground beef you set aside earlier
Cook and stir until desired consistency (too thick? add some water)
Now, your sauce is ready.

To assemble the enchiladas, first fry a corn tortilla quickly in oil (for about 7-8 seconds/side; tortillas should bubble but not turn into crispy chips)
Next, place plenty of cheese and chopped onions in the tortilla and quickly roll and place in baking dish

Continue this assembly until you have used all your tortillas. You'll want 2-3 enchiladas per person.


Once baking dish is full, pour on the sauce, add cheese on top, and bake at 450 for approx. 10 minutes or until bubbly.

...when we go home to Dallas for Christmas, I will be highly disappointed if we don't eat Mexican food at least once-a-day.

Sunday, November 14, 2010

Apple Pie

Everyone in New England loves to go apple picking. I, for one, had never even heard of the activity until we moved to our new home in Boston. And alas, with weekend trips, cases to read and football games to watch, we were hard pressed to find time to head out to the orchards.

But meanwhile, my alma mater football team is... emm... rebuilding.

Sad yes, but interestingly enough, this provided Hubby and me the perfect opportunity to forgo ESPN Game Day watching head out to do some picking. Per a work pal's suggestion, off to Smolak Farms we drove, eager to gather ourselves a bushel or two of crispy deliciousness.

We drove down the highway and then through some winding roads lined with foliage and paneled houses with porches cluttered with the last hydrangea blooms. We eventually made it to Andover, MA. Andover is the most charming little town and home of some fantastically old prep schools, too.

At last, we arrived.


The farm was beautiful. Instantly, I felt like I was back at Efurd Orchards in East Texas to pick peaches, only this time, I was bundled up in a scarf and given a crazy orange picking tool that looked kind of like a lacrosse stick.


So we got to picking. Well, searching for apples to pick that is. At first, all we saw were millions of empty trees and lots of apples on the floor. Surely these are not the ones we take, right?

Right.

A few rows back and we found the trees ripe for pickin'.

Little did I know, apple orchards are gorgeous. Blame my non-regional ignorance. I'm sure it's made even by someone else who thinks I ride a horse to the office and collect tumbleweeds in my yard.

So finally, we had our batch.


About 50 apples later, we were ready to head home out of the cold to start fixing our pie.


Ahhh, the pie.


People. It was so good! And such fun to use apples we had hand-selected just hours earlier. And I know what you must be thinking... "I've never seen a lattice-topped apple pie?!" Well friends, neither have I, come to think of it. Turns out I got a bit overzealous and didn't have the foresight to realize that my apples wouldn't steam properly without adequate cover. So... if you like a crisper apple pie, you can copy me... But I suggest not copying me if you're looking for that classic melty, gooey, apple pie. If so, then cover it all up tight and consider cooking the apples down prior to placing in the pie.

Nonetheless, Hubby made his famous crust (his mom's recipe from childhood) which was just outstanding.


I used the remaining crust to weave a topping. Takes a little patience, but sure is pretty and definitely worth the finesse to add a pretty finish (but remember... not ideal for this kind of pie, I learned the hard way).


Into the crust went some filling - a simple mix of apples, cinnamon, flour, sugar, lemon and nutmeg. I used Martha Stewart's Double Crust Apple Pie recipe.


Bake, serve and enjoy!

I of course think any pie is best with a healthy side of homemade whipped cream.

I'm rambling far too much, but I'll have to share Hubby's crust recipe soon. I'll do my best to get it posted before Thanksgiving.

Here's to a great week!

LinkWithin

Related Posts with Thumbnails