Showing posts with label baking. Show all posts

Friday, December 2, 2011

THE frosting

I can take absolutely no credit for it, but I also don't want to withhold such tasty information.

Joy the Baker - you've done it again.

The Best Chocolate Buttercream Frosting
via Joy the Baker (adapted from Delilah Bakery)

Ingredients
1 1/2 C (3 sticks...oops) unsalted butter, softened
1 C cocoa powder
3/4 tsp salt
4 C powdered sugar
2 tsp vanilla
1/2 C milk
1 C heavy cream
2/3 C Ovaltine (blast from the past, right??)

Directions
Cream butter, cocoa powder and salt together. I learned that having soft butter is key - this will save you lots of effort during the "creaming" process. Also, a stand mixer would be ideal... I was working with my Kitchenaid hand mixer, which I adore, but let's be real, it's no Kitchenaid Stand Mixer.

Continue mixing and add in powdered sugar while adding milk and vanilla extract. Hubby and I learned this was a great teamwork opportunity. No WAY I could have mixed in all that good stuff without absolutely spilling it everywhere.

Increase mixer speed and beat until smooth.

Separately in a 2C measuring glass, stir together heavy cream and Ovaltine. Pour this into the frosting slowly until the consistency is to your liking.

You're done!

I wish I had an equally awesome cake recipe to share, but this time due to scheduling limitations, we had to go with the box. Shhh.... don't tell anyone! The cake was made particularly with my grandfather in mind. He is crazy about his chocolate cake, so I knew this would be a fun Thanksgiving/92nd birthday treat!


We may or may not still be eating the remaining frosting. Out of a bowl. With no accompaniment.

Friday, November 4, 2011

Sugar, Spice and Everything Nice

And no, despite the sudden surge of baby bumps among my lady friends, I am not talking about babies. I'm talking about cupcakes!


I needed to bring something sweet and savory to our quarterly whisky dinner club (yes, you heard me... I like to keep a few surprises up my sleeve) so when I came across these absolutely lovely cakes on joylicious (swoon) I knew I'd met my match. The fact that the recipe comes from Martha only further validated my impulse to bake.

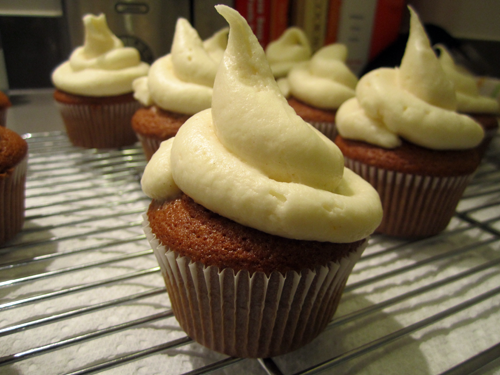
Pumpkin Spice Cupcakes with Cream Cheese Frosting


Ingredients
Cupcakes
( makes 18, or 12 and one mini-cake, which is what I did)
2 cups all-purpose flour
1 teaspoon baking soda
1 teaspoon baking powder
1 teaspoon coarse salt
1 teaspoon ground cinnamon
1 teaspoon ground ginger
1/2 teaspoon freshly grated nutmeg
1/2 teaspoon ground allspice
1 cup packed light-brown sugar
1 cup granulated sugar
1 cup (2 sticks) unsalted butter, melted and cooled
4 large eggs, lightly beaten
1 can (15 ounces) pumpkin puree (I didn't use the whole can... more like 1/2 - 2/3 to avoid an overpowering pumpkin taste)


Frosting 
(this quantity is pretty large... I halved it for one dozen cupcakes and had a little leftover for a light layer over my mini-cake which I made out of my leftover batter - this made a great treat to share at the office the next day)
16 oz cream cheese, softened
4 sticks butter, softened
1 teaspoon vanilla extract
4 cup sifted confectioners’ sugar
1 teaspoon of cinnamon - that was my little addition - it gave the icing a really nice scent and a pretty speckled look

Directions
Preheat oven to 350 (if your oven is under your stove, now is the time to place your butter and cream cheese on stove top to get rid of the fridge chill... keep both packaged for now, obvi)
Line cupcake pan with liners
In medium bowl, mix dry cupcake ingredients (flour, baking soda, baking powder, salt, cinnamon, ginger, ginger, nutmeg, allspice)
In large bowl, mix sugar, brown sugar, butter, eggs
Mix wet and dry together in large bowl and stir until smooth
Add pumpkin puree (again: I didn't use the whole can... I wanted my cake to taste more spice-like and less pumpkin pie-like)
Fill cupcake liners 1/2 way with batter (I use the ladle and spoon method to get a more precise pour into each cup - this will help you develop a more uniform-looking batch in the end)
Bake for 24ish minutes or until the cakes bounce back when touched (as always, I do a mid-bake rotation to account for any unevenly heated spots in my oven)

Meanwhile... let's get the frosting going. You'll want to use your stand or hand mixer to get a really nice texture.

In a large bowl, mix butter and cream cheese
Add in powdered sugar - s-l-o-w-l-y and mix... if you're not careful, your kitchen will look like the North Pole in no time
Add vanilla and mix until smooth
Add cinnamon and mix until smooth
Let chill in fridge while the cakes bake

When your cakes are done, remove them from the oven and place the cupcakes on a wire rack to cool (I did this after 5-10ish minutes when they were cool enough to handle comfortably)

Only when cupcakes are completely cool should you consider topping them with icing - if you don't wait, you'll get a melty gooey result that just looks bad. Don't do it.
So once cool, remove the frosting from the fridge and scoop it into a large ziploc bag - this will be your icing tool! If you have a real icing tool, congratulations, but for those of us who don't, this trick works great (a guy in my apartment asked if I picked these up a local boutique shop - obvi the highlight of my day)
Cut a tiny slit in the corner of the bag and now you can "pipe" the frosting neatly onto the cakes
I dusted mine with cinnamon, but other cute ideas are to top with brown sugar, walnuts, etc.


As always, I knew this recipe was a success because I had exactly zero leftovers. Nada. Just lots of empty plates and platters and that is the way I like it.

Hope you enjoy this yummy fall treat!

Friday, September 16, 2011

Cheddar and Onion Scones

A savory breakfast lover's dream, these creamy biscuit-like scones are simply divine. The best news is that the recipe is totally interchangeable, so you can tailor it to your liking day by day.

Props to Smitten Kitchen for a convincing me that scones can be a cinch to make. My worry melted away as I saw that the steps were quite simple, the ingredients were quite few, and after a few quick pulses on my Cuisinart, these dreamy creamy scones would soon be mine.

When out of town guests headed were headed our way last weekend, I knew I had to prepare the perfect something for a morning pick-me-up. Inspired by one of our favorite Cambridge bakeries, Darwin's Ltd., it was clear I would need to go with something savory - perhaps a remake of Hubby's and my ultimate Saturday indulgence: the cheddar and onion scone.

My cousin actually said to me, "I wasn't too excited when you told me you made scones, but I didn't realize they could be soft and moist!" Or something to that effect... :) I took it as a compliment - but it was the empty service platter that further validated my assumption.

Without further ado, the recipe. As I mentioned before, please replace our cheddar and onions with your favorite treat - chocolate chips, blueberries, bacon, etc...

America's Test Kitchen Cookbook, via Smitten Kitchen
(with, of course, our own personal cheddar and onion rendition!)

Ingredients
2 C all-purpose flour
1 T baking powder
1/2 tsp salt
3 T sugar
5T chilled unsalted butter (cut into little cubes)
*1/4 lb cheddar cheese
*1 red onion, caramelized
1 C heavy cream
(*if using another filling, something in the 1/2 C range is a good measure)

Directions
Preheat oven to 425
Place dry ingredients in Cuisinart (flour, baking powder, sugar, salt)
Pulse six times (if doing by hand, just mix together quickly)
Add cubed butter to Cuisinart and pulse until meal-like (not too many times...use forks to press into dry ingredients if doing by hand)
Add cheese and onions
Add heavy cream and stir for 30 seconds until dough-like
Flour a clean dry counter top
Place dough onto floury surface and quickly mold into desired shape (for me, I molded by hand into a 1 in high square; also consider using a 9" round cake pan as a mold, or a biscuit cutter for a round shape)
Next, cut your dough into the desired shape - I simply used a sharp knife to create 3x3 squares (in retrospect it would have been cute to then cut the squares into more scone-like triangles)
If using the round cake pan method, turn dough out and cut into wedges
At this stage, it is safe to freeze your unbaked scones - I transferred mine to a freezer-safe plate and covered tightly with plastic wrap, then foil (when ready to bake, place right onto baking sheet and add a few minutes to baking time)
Place on baking sheet and bake until light brown for 12-15 minutes
Remove from oven, let cool and serve to a hungry audience :)


Friday, September 9, 2011

Sneak Peek

Well, I managed to make a certified mess of our kitchen this morning... but I think it will be well worth my pending adventure in clean-up.

Cheddar Onion Scones (in the making)


Wednesday, December 1, 2010

Wifey Wednesday

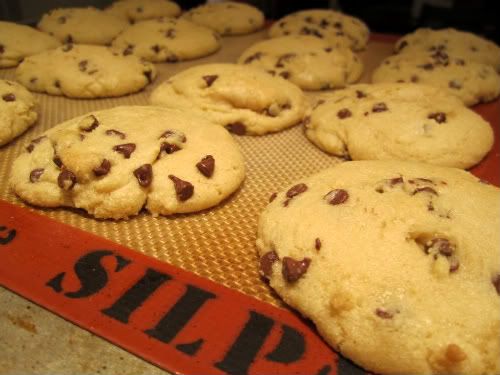
Every wife needs to have the perfect chocolate chip cookie recipe up her sleeve - especially now that it's December 1: Baking Season has begun.


 I'll let you in on my little secret. It's been in the works for years, and is really the single recipe that made me fall in love with baking (and subsequently cooking). Starting back in high school, I got the itch to bake and a certain group of boys (future Hubby, cough, cough) made frequent trips to my parents home to see if by chance a fresh batch had been baked.

Many nights we I spent baking.... and we would eat... and eat... and eat the dough before the cookies were baked, and then eat the next batch before I could even get them onto plates. I would guess that if you went to high school with me, or knew me at that time, you have tasted this recipe first-hand. For the rest of you, I'll do my best to distribute the goods around, but in the meantime, you can try your hand at these: 

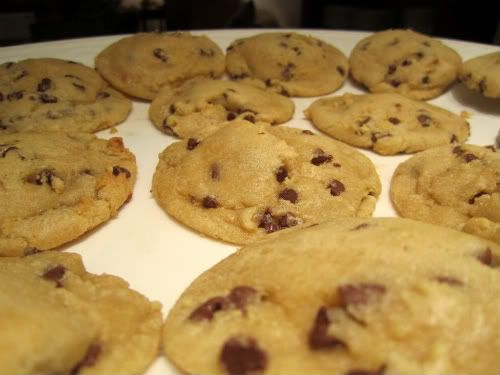
Hallie's Homemade Cookies

Ingredients:
1 1/4 C flour
1/2 C granulated sugar
1/2 C brown sugar (pack super tight and measure a heaping amount)
1/2 tsp baking soda
1/2 tsp Kosher salt (heaping)
1/2 tsp vanilla extract (another heaping amount here)
1 large egg
1 stick unsalted butter
1/2 bag semi-sweet chocolate chips (I think too many makes the cookies hard to eat) 

Directions:
Preheat oven to 350
Sift dry ingredients (flour, baking soda, salt) into a large bowl
In a separate bowl, add granulated sugar and brown sugar
Melt butter in microwave-safe bowl
Whisk egg with hand-mixer or stand-mixer
Combine egg with  sugar mixture
Add melted butter and vanilla to sugar/egg mixture and combine thoroughly (I recommend a stand-mixer, but can be done by hand if very thorough)
Once smooth and mousse-like, add this mixture to the large bowl with the flour mixture
Combine thoroughly, careful to mix in all flour
Add chocolate chips and distribute evenly
Cover the dough bowl tightly with saran wrap and chill in the freezer for 10-15 minutes (can be overnight, too)
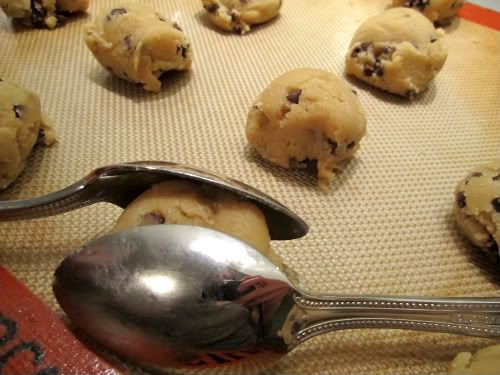
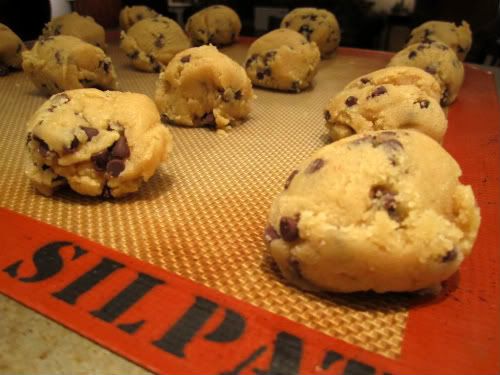
Once chilled, scoop into spoon-sized balls and place on Silpat on baking sheet (I can fit 16 cookies on a sheet) **It should be noted that a Silpat mat is one of the best baking investments you can make. It ensures an even, clean bake and allows you to get really soft edges and lovely texture, even on the bottom of your treats
Bake for 8 minutes, and rotate the tray 180 degrees at 4 minutes (to ensure even baking)
Remove cookies from oven promptly at first sign of cookedness (8 minutes... I guarantee you will not think they are done)
Let cookies cook ON baking sheet for another 10-15 minutes ** this is crucial out-of-oven bake time
Gently transfer cookies to cool china plate
Serve and enjoy!


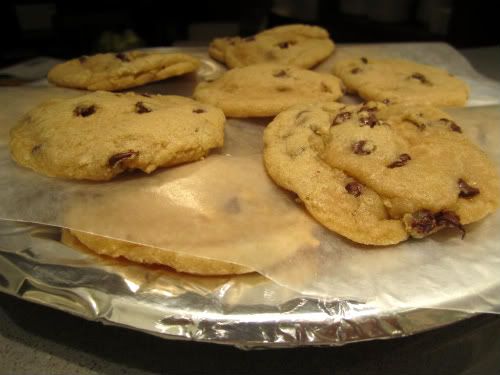
Sending your cookies to-go?

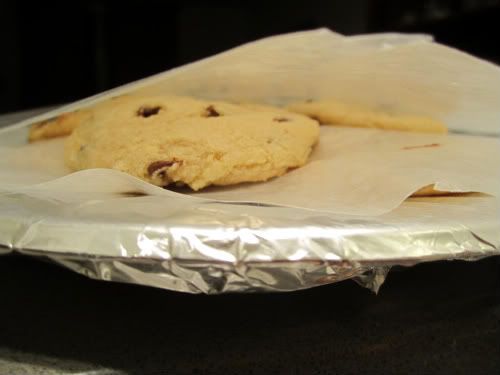
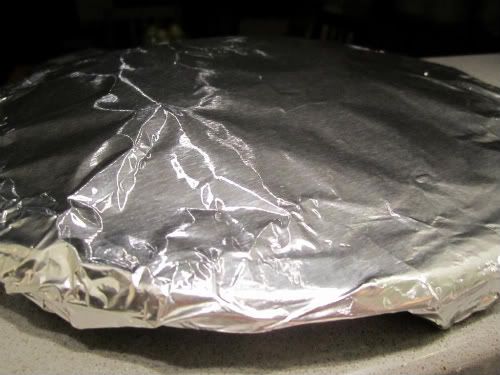
I've developed a trusty packing method that will ensure they arrive intact and just as good as can be. First gather your supplies: a sturdy paper plate, aluminum foil, and wax paper.

Line your plate with foil and secure around the edges. Place one layer of cookies, flat and not overlapping, and then cover with a sized piece of wax paper. Repeat with another layer of cookies covered with wax paper. This can be repeated to make 3 layers with about 6 cookies per layer.


On the top layer, place wax paper and then a final foil covering, secured around the edges.


See, even the HBS kids like getting treats at school!

Sunday, November 14, 2010

Apple Pie

Everyone in New England loves to go apple picking. I, for one, had never even heard of the activity until we moved to our new home in Boston. And alas, with weekend trips, cases to read and football games to watch, we were hard pressed to find time to head out to the orchards.

But meanwhile, my alma mater football team is... emm... rebuilding.

Sad yes, but interestingly enough, this provided Hubby and me the perfect opportunity to forgo ESPN Game Day watching head out to do some picking. Per a work pal's suggestion, off to Smolak Farms we drove, eager to gather ourselves a bushel or two of crispy deliciousness.

We drove down the highway and then through some winding roads lined with foliage and paneled houses with porches cluttered with the last hydrangea blooms. We eventually made it to Andover, MA. Andover is the most charming little town and home of some fantastically old prep schools, too.

At last, we arrived.


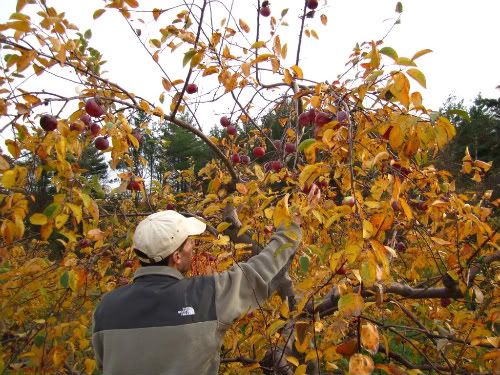
The farm was beautiful. Instantly, I felt like I was back at Efurd Orchards in East Texas to pick peaches, only this time, I was bundled up in a scarf and given a crazy orange picking tool that looked kind of like a lacrosse stick.


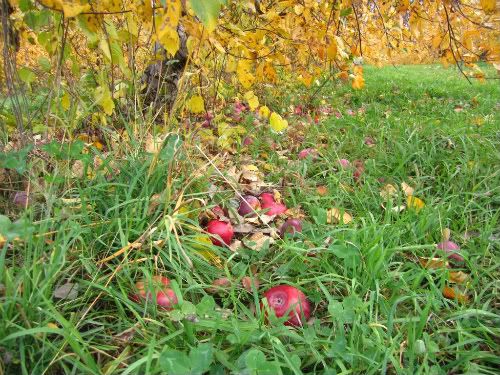
So we got to picking. Well, searching for apples to pick that is. At first, all we saw were millions of empty trees and lots of apples on the floor. Surely these are not the ones we take, right?

Right.

A few rows back and we found the trees ripe for pickin'.

Little did I know, apple orchards are gorgeous. Blame my non-regional ignorance. I'm sure it's made even by someone else who thinks I ride a horse to the office and collect tumbleweeds in my yard.

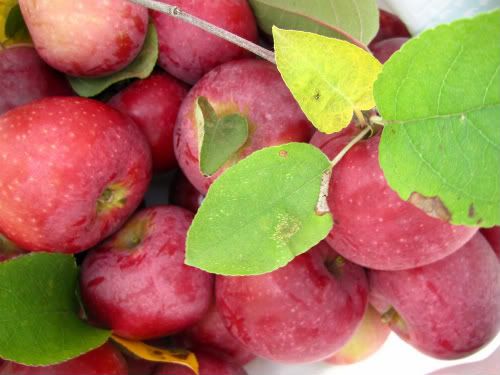
So finally, we had our batch.


About 50 apples later, we were ready to head home out of the cold to start fixing our pie.


Ahhh, the pie.


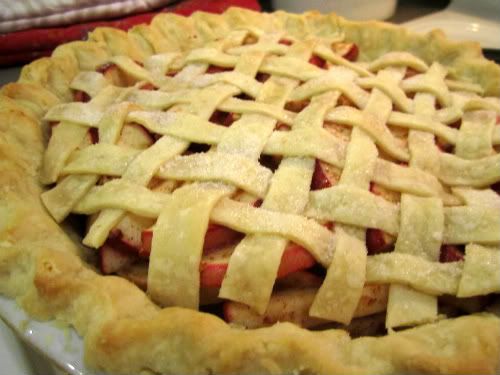
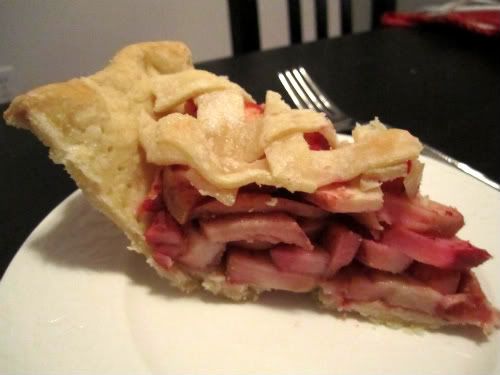
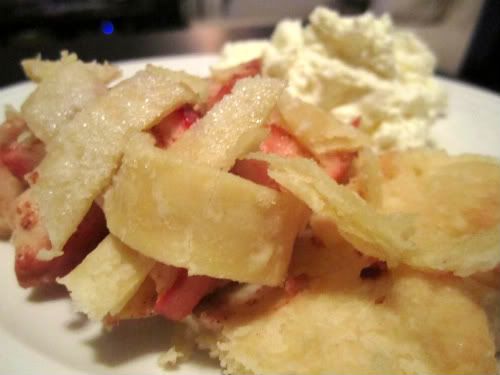
People. It was so good! And such fun to use apples we had hand-selected just hours earlier. And I know what you must be thinking... "I've never seen a lattice-topped apple pie?!" Well friends, neither have I, come to think of it. Turns out I got a bit overzealous and didn't have the foresight to realize that my apples wouldn't steam properly without adequate cover. So... if you like a crisper apple pie, you can copy me... But I suggest not copying me if you're looking for that classic melty, gooey, apple pie. If so, then cover it all up tight and consider cooking the apples down prior to placing in the pie.

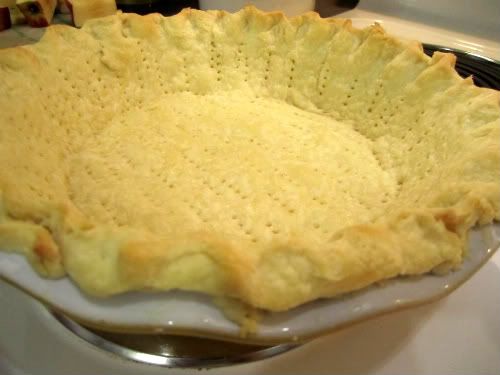
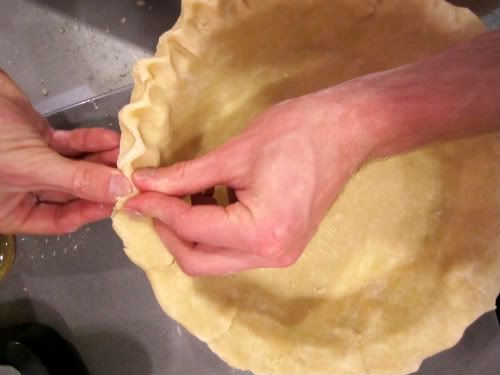
Nonetheless, Hubby made his famous crust (his mom's recipe from childhood) which was just outstanding.


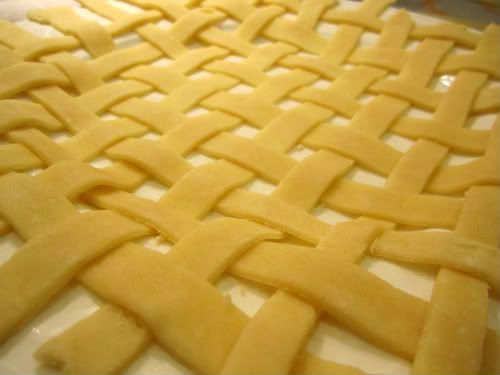
I used the remaining crust to weave a topping. Takes a little patience, but sure is pretty and definitely worth the finesse to add a pretty finish (but remember... not ideal for this kind of pie, I learned the hard way).


Into the crust went some filling - a simple mix of apples, cinnamon, flour, sugar, lemon and nutmeg. I used Martha Stewart's Double Crust Apple Pie recipe.


Bake, serve and enjoy!

I of course think any pie is best with a healthy side of homemade whipped cream.

I'm rambling far too much, but I'll have to share Hubby's crust recipe soon. I'll do my best to get it posted before Thanksgiving.

Here's to a great week!

Sunday, July 4, 2010

Patriotic Peach Cobbler

What better way to celebrate the 4th than with some delicious peach cobbler?

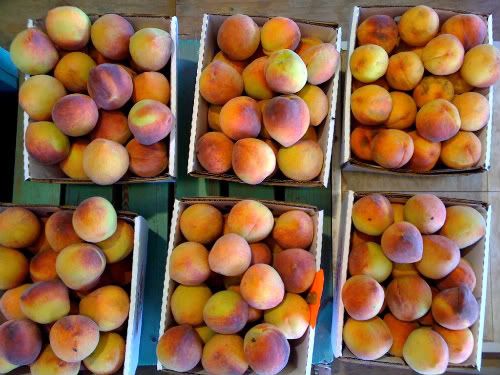
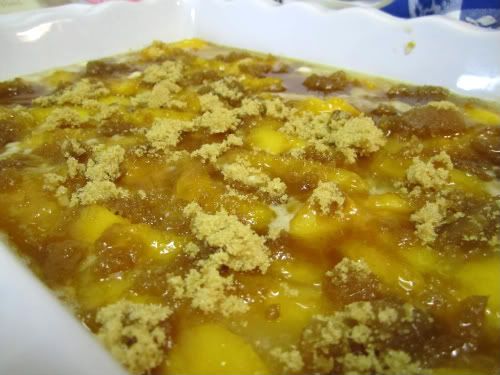
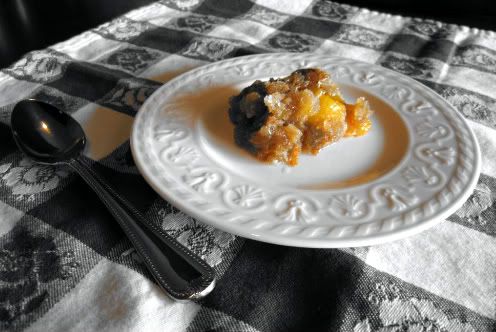
I found this deliciously awesome and easy recipe on one of my favorite baking blogs, Joy the Baker. I modified Joy's Nectarine and Cream cobbler to include East Texas peaches, handpicked in Pittsburg, Hubby's mother's hometown. Remember our trip last year? We headed East to Efurd's Orchard (a true local favorite) and hand-selected as many peaches as we could carry.


Today's were peaches from that crop. With careful preservation, the peaches saved perfectly after almost exactly one year, and here they are this afternoon to help us ring in Independence Day in 2010.


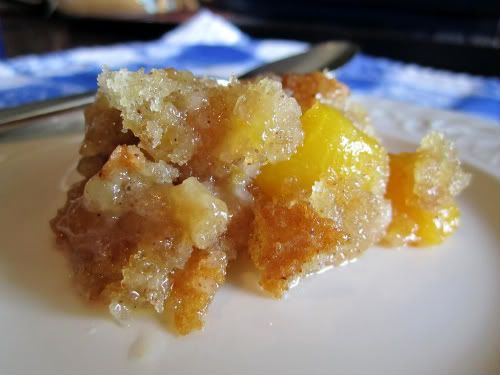
The cobbler is simple, yet divine.

The recipe's method is easy, and is based on a kind of layering technique that does lots of work for you (score!) in the oven.


Life as a Wife's adaptation of Joy's Easy Nectarine and Cream Cobbler, adapted from The Pastry Queen's cobbler... it's a mouthful, but a really good mouthful

Ingredients
1/2 C (1 stick) unsalted butter
1 C granulated sugar
1 C all-purpose flour
1 Tbsp baking powder
1/2 tsp cinnamon
pinch of cloves
pinch of freshly grated nutmeg
3/4 C milk (low fat milk will work fine)
3 C sliced peaches (frozen are okay, but fresh is always best if you have it on hand)
1/3 C firmly packed brown sugar

Directions
Preheat the oven to 350 degrees F.

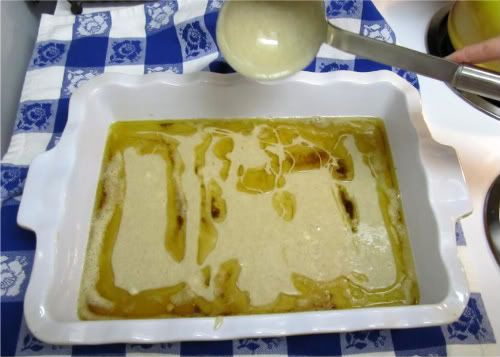
Melt the butter in a medium saute pan set over medium high heat until it bubbles and turns a nut brown color.  Watch the butter closely, as it can go from browned to burnt in just a few seconds.  The butter will have all sorts of browned bits in it.  Joy says that’s good!

Pour the butter into an 8" or 9" square or rectangle baking dish - I used my 9x13 baker and multiplied all ingredients by 1.25 to make up for the slightly larger dish.

In a medium bowl, stir together the granulated sugar, flour, baking powder and spices.  Add milk and stir.

Pour the mixture on top of the melted butter and don't stir. I used a ladle so I wouldn't be tempted to redistribute the batter. NOTE: Please ignore the obscene amount of butter I used.... that was perhaps the only ingredient that didn't need to be increased for my pan :) However, I'm not saying it didn't taste delicious... just maybe don't tell your guests.


Without mixing, arrange the fruit evenly over the top of the batter.

Sprinkle with brown sugar.


Bake the cobbler for 40 to 45 minutes, until the top turns golden brown.  The batter will migrate from the bottom of the pan to cover the fruit.  Serve warm with slightly sweetened whipped cream or vanilla ice cream.

Saturday, June 19, 2010

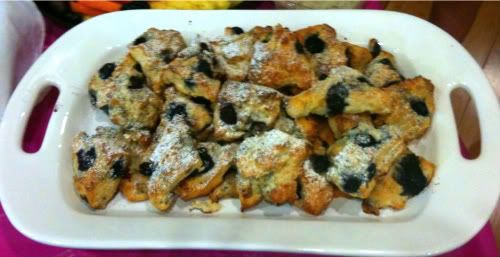
I know you were totally eyeing those scones...

Who wouldn't be?!


Dearest Mrs. A shares her secrets for scone success (adapted from the lovely Tyler Florence): 

Blueberry Scones

Ingredients:
2 C all-purpose flour
1 tbsp baking powder
1/2 tsp salt
2 tbsp sugar
5 tbsp unsalted butter, cold, cut in chunks (Mrs. A used 8 tablespoons - 1 stick - instead... go girl!)
1 C heavy cream, plus more for brushing the scones
1 C fresh blueberries (Mrs. A used frozen blueberries - they don't bleed as much into the batter, so you don't have blue scones. She also made part of her batch with frozen blackberries, and they worked well.)


Lemon Glaze*:

1/2 C freshly squeezed lemon juice

2 C confectioners' sugar, sifted

1 lemon and its zest, finely grated

1 tbsp unsalted butter 

*If you'll be transporting the scones outside of your home, you may consider using a dusting of powdered sugar, instead of the lemon glaze - it's every bit as delicious... pretty too!


Directions

Preheat the oven to 400
Sift together the dry ingredients; the flour, baking powder, salt, and sugar. 
Using 2 forks or a pastry blender, cut in the butter to coat the pieces with the flour. (Mrs. A used her Cuisinart instead.) The mixture should look like coarse crumbs. 
Make a well in the center and pour in the heavy cream, and fold everything together just to incorporate; do not overwork the dough. (Mrs. A poured the heavy cream in through the top of the Cuisinart while it was running so that the cream mixed in gradually, until it formed a dough ball inside the Cuisinart. Sometimes you may need a little more cream than it calls for.)
Fold the blueberries into the batter. Take care not to mash or bruise the blueberries because their strong color will bleed into the dough. (This is why Mrs. A used frozen.)
Press the dough out on a lightly floured surface into a rectangle about 12 by 3 by 1 1/4 inches. Cut the rectangle in 1/2 then cut the pieces in 1/2 again, giving you 4 (3-inch) squares. Cut the squares in 1/2 on a diagonal to give you the classic triangle shape.

Place the scones on an ungreased cookie sheet and brush the tops with a little heavy cream. (Mrs. A also sprinkled sugar on top to give them a little more of a crust. Another pretty idea is to use sanding sugar.) 

 Bake for 15 to 20 minutes until beautiful and brown. Let the scones cool a bit before you apply the glaze (or powdered sugar, your preference).
Technically you should make the lemon glaze in a double boiler (i.e. over a pot of simmering water with a heatproof bowl set on top) but it's even simpler to zap it in the microwave.

Mix the lemon juice and confectioners' sugar together in a microwave-safe bowl.

Stir until the sugar dissolves. Add the lemon zest and butter. Nuke it for 30 seconds on high.

Whisk the glaze to smooth out any lumps, then drizzle the glaze over the top of the scones. Let it set a minute before serving.

What a perfect Saturday morning treat - thanks, Mrs. A!

Saturday, March 14, 2009

Saturday Musings

Last weekend:


This weekend:


...know what I mean?

After sleeping off a delicious Javier's Filete Cantinflas, this was not quite the cheery spring morning I was hoping for. In an effort to undo the evils of unpredictable Texas weather, I started my search for the perfect Easter table linens and tablescape accessories. I am trying to decide if I should go traditional (my usual tendency) or super-fun and colorful. I mean, I guess you can never have too many options when it comes to tabletop decor.

I was also inspired by this eggy delight at Pottery Barn:


How could you not sing for joy while sitting at that table?! All I know is that regardless of my decision, these adorable measuring cups from Anthro (of course!) will hopefully be part of the display (ok, fine, they're for my baking collection and would look oh-so-cute with my buttercup yellow mixer, but very fitting with the season nonetheless!)


Thoughts?

Hopefully dinner tonight at Nick & Sam's Grill will help brighten up this dreary day. Restaurant review coming soon!

LinkWithin

Related Posts with Thumbnails